Hey there! I present to you today one of the most unexpectedly delicious delights that requires just one ingredient—the joy of cooking with simplicity. This caramel, known as “Dulce de Leche” in Latin America and “Cajeta” in Mexico, is going to be made in a slow cooker using sweetened condensed milk. The fact that something with such a deep and nuanced taste can be born from something so simple is astounding. Even though people have been enjoying this method for years—making caramel from sweetened condensed milk—I still think it’s worth trying again and again because of the culinary enchantment it has. This might be a tasty addition to pastries, a way to sweeten coffee, or simply a kind present for a friend.
Recommended Serving Sizes: You won’t believe how many uses this caramel, which is sweetened condensed milk cooked slowly, has. You may pour it over a hot brownie, top your pancakes in the morning, add it to trifles, or swirl it into cheesecakes. Indulge in it with sliced apples, dip pretzels in it for a luscious treat, and top off your ice cream sundae with it. The only limit here is your creativity!
This is just fantastic! Its solitary element is so unbelievable to me!
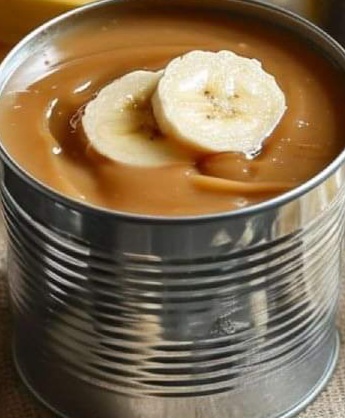
Sweetened condensed milk caramel cooked slowly in a saucepan
Yields: Servings 1 and a half cups of caramel sauce
Use one 14-oz can of sweetened condensed milk as an ingredient.
What to do:
First, without opening the can, take the label off the sweetened condensed milk. You wouldn’t want anything floating about in your slow cooker, so be sure the can is free of any paper residues.
2. In the base of the slow cooker, set the can on its side. Most slow cookers have enough room for a couple of cans, so don’t worry if you’re planning on creating a big amount.
3. Put the cans in the slow cooker and cover them with water, making sure there’s at least 2 inches of water around them. This will keep the cans from exploding from the pressure buildup.
4. Reduce heat to low and simmer, covered, for 8 hours. Use caution while removing the can using tongs, as it is quite hot.
5-Before opening, let the can cool to room temperature. The caramel will thicken to the ideal spoonable consistency as it cools, and this is the magical part.
After it has cooled, open the container to reveal your handmade caramel, a golden gem that will enhance whatever dish (or spoon) it comes into contact with.
Changes and Hints:
– Reduce the cooking time of the can to, say, 6 hours if you like a lighter caramel.
Keep in mind that the contents might be very harmful and cause burns if they were to explode out of the can, so it’s best to avoid opening the can while it’s still hot.
Cooking many cans of caramel at once and storing them in the pantry (unopened) will allow you to produce a batch ahead of time. –
Once the caramel has cooled, you may add a sprinkle of sea salt or half a teaspoon of vanilla extract for a fusion of vanilla and caramel if you’re looking to amp up the flavor.
Making this caramel under pressure takes just around 40 minutes if you’re up for an adventure and have a pressure cooker. For instructions on how to safely use your pressure cooker, be sure to consult the handbook