Description
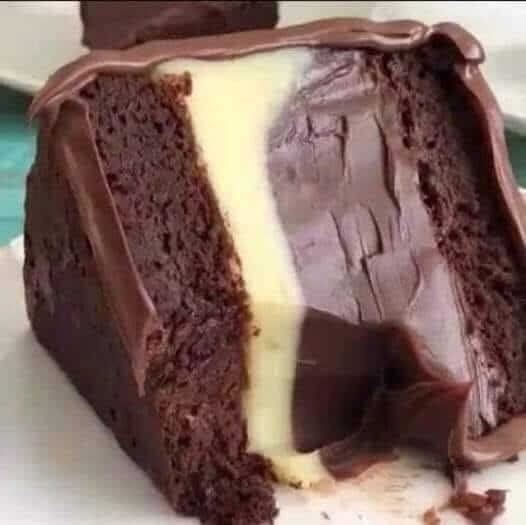
Rich, tender, and deeply chocolatey—this vintage-style cake is a hidden gem from classic European baking traditions. With a fine crumb, moist texture, and deep cocoa flavor without the need for Dutch-process chocolate, it’s an elegant dessert that feels both nostalgic and timeless. Made with evaporated milk and a touch of cornstarch for silkiness, this old-fashioned Swiss chocolate cake bakes up perfectly level, making it ideal for layering, frosting, or enjoying simply dusted with powdered sugar.
Why You’ll Love This Recipe
This isn’t just another chocolate cake—it’s a whisper from the past. Inspired by Swiss home kitchens and mid-century American baking, this recipe uses simple ingredients to create something extraordinary. The evaporated milk adds richness without heaviness, while cornstarch ensures a delicate, velvety crumb. It’s not overly sweet, but deeply satisfying—like a fine truffle in cake form.
Perfect For
• Birthdays, anniversaries, and celebrations
• Make-ahead desserts (tastes even better the next day!)
• Fans of fudge, devil’s food, or flourless cakes
• Bakers who love retro recipes with modern results
Ingredients (Makes Two 9-inch Layers)
For the Cake
• 2 cups (240g) all-purpose flour, spooned & leveled
• 1½ cups (300g) granulated sugar
• 2 tsp baking powder
• 2 tsp baking soda
• 1 tsp salt
• 2 tbsp (16g) cornstarch (key for tenderness)
• 4 oz (115g) unsweetened baking chocolate, melted and cooled
• ½ cup (115g) unsalted butter, softened
• 2 large eggs, room temperature
• 1¼ cups (300ml) evaporated milk
• 1 tbsp pure vanilla extract
Step-by-Step Instructions
Step 1: Preheat the Oven
Preheat oven to 325°F (163°C). Grease two 9-inch round pans and line the bottoms with parchment paper.
Step 2: Cream Butter and Sugar
In a large mixing bowl, beat softened butter and sugar together for 3–5 minutes until light, fluffy, and pale in color.
Step 3: Add Eggs
Add eggs one at a time, beating well after each addition and scraping down the bowl as needed.
Step 4: Add Chocolate
Pour in the cooled melted chocolate and mix on low speed until fully blended.
Step 5: Combine Dry Ingredients
In a separate bowl, whisk together flour, baking powder, baking soda, salt, and cornstarch.
Step 6: Alternate Dry and Wet Ingredients
With the mixer on low speed, add the dry ingredients and evaporated milk alternately:
• Start with ⅓ of the flour mixture
• Then add ½ of the milk
• Repeat, ending with the remaining flour
Mix just until combined—do not overmix.
Step 7: Add Vanilla
Stir in vanilla extract on low speed until incorporated.
Step 8: Bake
Divide the batter evenly between the prepared pans. Smooth the tops and bake for 20–25 minutes, or until a toothpick inserted in the center comes out clean.
Step 9: Cool the Cakes
Let the cakes cool in the pans for 5 minutes. Run a knife around the edges, invert onto wire racks, remove parchment, and allow to cool completely.
Step 10: Serve
Frost with your favorite chocolate buttercream, whipped cream, or ganache—or simply dust with powdered sugar.
Tips You Must Know
• Use evaporated milk, not sweetened condensed or regular milk.
• Cool the chocolate before adding it to the batter.
• Don’t overbake—the cake stays moist even when slightly underdone.
• Tastes better the next day as the flavor deepens.
• Freezer-friendly for up to 3 months (unfrosted).
Storage Tips
• Store unfrosted layers wrapped tightly at room temperature for 2 days, or freeze for longer.
• Frosted cake lasts up to 5 days in the fridge—bring to room temperature before serving.
• Freeze whole or sliced portions, wrapped well, and thaw in the fridge overnight.
Ingredient Substitutions
• Evaporated milk → Whole milk simmered down by ⅓
• Butter → Plant-based butter or ghee
• Flour → Gluten-free 1:1 blend
• Eggs → Flax eggs (2 tbsp ground flax + 6 tbsp water)
• Vanilla → Almond extract (½ tsp)
Serving Suggestions
• Serve on a cake stand with candles for celebrations
• Perfect for potlucks or gatherings
• Double the batch and freeze half for later
• Pair with coffee, tea, or cold milk
Cultural Context
Rooted in Swiss and Alpine baking traditions, this cake showcases how precision and simplicity create timeless elegance. Found in home kitchens, holiday tables, and vintage cookbooks, it’s a reminder that comfort and class can come from the simplest recipes.
Pro Tips
• Double the recipe for a tall three-layer cake
• Add ½ cup chocolate chips for extra richness
• Make ahead—bake 1–2 days in advance and wrap tightly
• Label your dish—everyone will ask for the recipe
Frequently Asked Questions
Q: Can I use cocoa powder instead of chocolate?
A: No, the recipe relies on unsweetened chocolate for structure and balance.
Q: Why is my cake dense?
A: You may have overmixed or used expired baking powder/soda.
Q: Can I make cupcakes?
A: Yes! Fill liners ¾ full and bake at 325°F for 18–22 minutes.
Q: Is it gluten-free?
A: Only if made with a certified gluten-free flour blend.
Q: Can I air fry it?
A: Not recommended; use the oven for best texture.
Allergy Information
Contains: dairy, eggs, and wheat.
Gluten-free with GF flour.
Naturally nut-free, but always check labels.
Nutrition Facts (Per Slice – Unfrosted)
Calories: 280 | Fat: 12g | Saturated Fat: 7g | Carbs: 40g | Sugar: 24g | Protein: 5g | Sodium: 380mg
Final Thoughts
This cake doesn’t shout—it speaks softly with rich chocolate aroma and tender crumb. Every slice tells a story of care, tradition, and timeless flavor. Simple, classic, and unforgettable—just the way chocolate cake should be.