Canning your own ground beef is a game-changer for quick weeknight meals. This method, often called the “raw pack” or “hot pack” method, preserves the meat’s texture and flavor, providing you with a shelf-stable protein source that’s ready to use in tacos, chili, or pasta sauce in seconds.
Meta Description: Learn how to safely pressure can ground beef at home. This step-by-step guide covers the raw pack method for shelf-stable, ready-to-eat meat.
Ingredients
- Ground Beef: Use lean ground beef (at least 80/20, though 90/10 is preferred for less grease in the jar).
- Canning Salt: 1/2 teaspoon per pint jar or 1 teaspoon per quart jar (optional, for flavor).
- Boiling Water or Beef Broth: Only needed if using the “Hot Pack” method.
- Non-iodized Salt: (Optional) To maintain color and flavor.
Instructions
Step 1: Preparation
Wash your jars, lids, and rings in hot, soapy water. Ensure the jars are free of any nicks or cracks. Keep the jars warm to prevent thermal shock when filling.
Step 2: Preparing the Meat
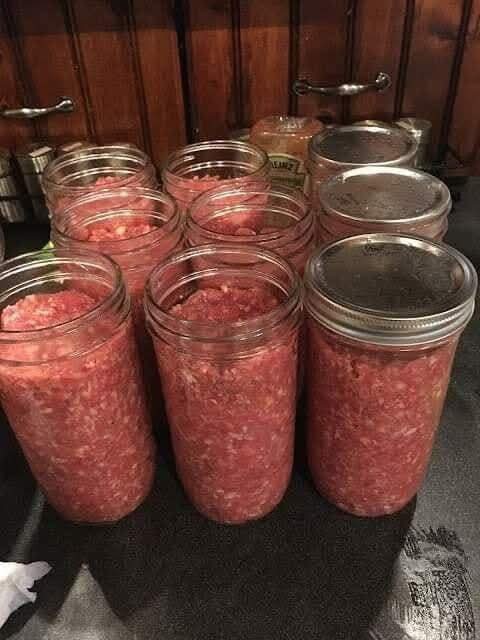
- Raw Pack Method (As shown in your image): Simply shape the raw beef into loose balls or crumbles. Do not pack it too tightly; you want the heat to penetrate the center easily.
- Hot Pack Method (Alternative): Brown the ground beef in a skillet first, drain the excess fat, and loosely fill the jars. Add boiling water or broth, leaving 1-inch headspace.
Step 3: Filling the Jars
Pack the raw meat into the jars, leaving 1 inch of headspace at the top. Add your canning salt if desired. Since meat releases its own juices, you do not need to add liquid for a raw pack.
Step 4: Seal the Jars
Wipe the rims of the jars with a clean, damp cloth (or a cloth dipped in white vinegar) to remove any grease. Place the lids on and screw the bands until fingertip tight.
Step 5: Pressure Canning
Place jars in your pressure canner with the required amount of water (usually 2-3 inches).
- Vent: Exhaust steam for 10 minutes.
- Process: Place the weight or close the petcock. Process at the pressure required for your altitude (usually 10-11 lbs for weighted gauges).
- Time: Process Pints for 75 minutes and Quarts for 90 minutes.
Step 6: Cooling
Turn off the heat and let the pressure drop to zero naturally. Remove the jars and let them sit undisturbed on a towel for 12–24 hours. Check for seals—the lids should not flex up and down.
Service Suggestions
- Quick Tacos: Drain the liquid, toss in a pan with taco seasoning, and serve.
- Beefy Pasta: Add a jar directly to your favorite marinara sauce for an instant meat sauce.
- Shepherd’s Pie: Use the meat and the natural juices from the jar as the base for a savory pie.
Storage Tips
- Location: Store in a cool, dark, and dry place.
- Shelf Life: For best quality, consume within 12 to 18 months.
- Maintenance: Always remove the metal rings before storing to prevent “false seals” caused by rust or debris.
FAQs
Do I have to add liquid to the raw pack?
No. Raw ground beef contains enough moisture to create its own broth during the canning process.
Why is there white fat at the top of my jar?
This is normal! As the meat processes, fat renders out and settles at the top. When you open the jar, you can either discard it or stir it back in for flavor.
Can I use a water bath canner?
No. Meat is a low-acid food and must be processed in a pressure canner to eliminate the risk of botulism.
Conclusion
Pressure canning ground beef is a fantastic way to secure your food supply and save time in the kitchen. By following these safety protocols, you’ll have a pantry stocked with high-quality, pre-cooked protein that makes “what’s for dinner?” the easiest question of the day.