
Meta Description
Learn how to make the ultimate Crème Brûlée Cheesecake with this full step-by-step recipe, including ingredients, storage tips, serving ideas, and FAQs.
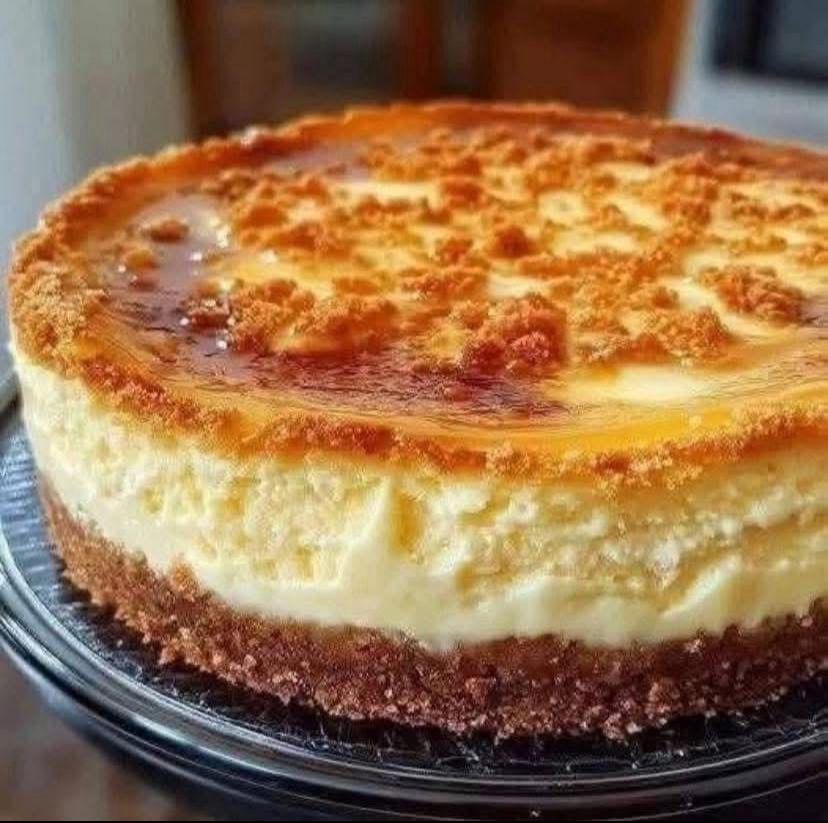
Combine the rich, creamy luxury of a classic New York cheesecake with the iconic, crackly burnt-sugar topping of a French crème brûlée. This show-stopping dessert features a buttery crust, a velvety vanilla bean cheesecake filling, and a torched glass-like caramel shell that shatters delightfully with every single bite.
Table of Contents
Ingredients
For the Crust:
- 2 cups graham cracker crumbs (or vanilla wafer / digestive biscuit crumbs)
- 1/3 cup granulated sugar
- 1/2 cup (1 stick) unsalted butter, melted
- A pinch of salt
For the Cheesecake Filling:
- 4 packages (8 oz each) cream cheese, softened to room temperature
- 1 cup granulated sugar
- 1 cup sour cream, room temperature
- 1 tablespoon vanilla bean paste (or pure vanilla extract)
- 4 large eggs, room temperature
- 2 tablespoons all-purpose flour
For the Crème Brûlée Topping:
- 1/3 cup granulated sugar (for torching right before serving)
Instructions
- Preheat and Prepare the Pan: Preheat your oven to 325°F (165°C). Wrap the outside of a 9-inch springform pan securely in a double layer of heavy-duty aluminum foil to prevent water from leaking in during the water bath. Lightly grease the inside of the pan.
- Make the Crust: In a medium bowl, combine the cookie crumbs, granulated sugar, melted butter, and salt until the mixture resembles wet sand. Press the mixture firmly into the bottom and slightly up the sides of the prepared springform pan. Bake for 10 minutes, then remove and let cool completely. Lower the oven temperature to 325°F if it was set higher.
- Beat the Cream Cheese: In a large bowl using an electric mixer on medium-low speed, beat the softened cream cheese and 1 cup of sugar until completely smooth, creamy, and fluffy (about 3-4 minutes), scraping down the sides of the bowl as needed.
- Add Flavor and Structure: Mix in the sour cream and vanilla bean paste until fully incorporated. Add the flour and mix just until combined.
- Incorporate the Eggs: Add the eggs one at a time, beating on low speed only until the yellow disappears into the batter. Do not overmix, or you will incorporate too much air, which causes cracks.
- Bake in a Water Bath: Pour the cheesecake batter over the cooled crust and smooth the top. Place the foil-wrapped springform pan inside a large roasting pan. Fill the roasting pan with boiling water until it reaches about halfway up the sides of the springform pan.
- Bake and Cool: Bake for 55 to 65 minutes, or until the edges are set but the center still has a slight jiggle. Turn off the oven, crack the oven door open, and let the cheesecake sit inside the warm oven for 1 hour to cool gradually.
- Chill: Remove the cheesecake from the water bath, remove the foil, and run a thin knife around the edges to loosen it. Chill in the refrigerator for at least 6 hours, preferably overnight, until completely firm.
Service Suggestions
- The Crack: Just before serving, blot any moisture off the top of the chilled cheesecake with a paper towel. Sprinkle an even layer of granulated sugar (about 1/3 cup) across the top. Use a kitchen torch to melt and caramelize the sugar until it turns amber and forms a hard, glassy crust. Let it sit for 2–3 minutes to harden before slicing.
- Garnish: Serve plain to let the dual textures shine, or accent the plates with fresh raspberries or a sprig of mint to cut through the rich sweetness.
Storage Tips
- Refrigerator: Store any leftover cheesecake in an airtight container or covered tightly in the pan in the fridge for up to 3 to 4 days. Note: The torched sugar crust will melt into a liquid caramel after a few hours in the fridge due to moisture, so it is best to torch only the slices you plan to serve immediately, or re-torch just before serving.
- Freezer: You can freeze the baked cheesecake without the caramelized sugar topping for up to 2 months. Wrap tightly in plastic wrap and aluminum foil. Thaw overnight in the refrigerator before adding the sugar topping and torching.
FAQs
Can I make this cheesecake without a water bath? While you can bake it without one, a water bath provides gentle, steam-filled heat that prevents the top from drying out, cracking, or sinking. It is highly recommended for a smooth texture.
What if I don’t have a kitchen torch? You can place the sugar-topped cheesecake under your oven’s broiler on the highest setting for 2 to 3 minutes. Watch it constantly so it caramelizes without burning, and rotate the pan if needed.
Why did my cheesecake crack? Cracks usually happen due to overbeating the batter (adding too much air), baking at too high of a temperature, or cooling the cake too rapidly. Letting it cool slowly in the turned-off oven helps prevent this.
The contrast between the velvety, rich custard-like cheesecake and the hard, glassy crunch of caramelized sugar makes this a masterclass in dessert texture. It bridges the gap between two legendary sweets, guaranteeing empty plates all around.
Conclusion
The contrast between the velvety, rich custard-like cheesecake and the hard, glassy crunch of caramelized sugar makes this a masterclass in dessert texture. It bridges the gap between two legendary sweets, guaranteeing empty plates all around.