
Meta Description: Learn how to bake traditional, melt-in-your-mouth Amish white bread with this easy step-by-step recipe. Yields two golden, fluffy loaves of homemade comfort food.
Table of Contents
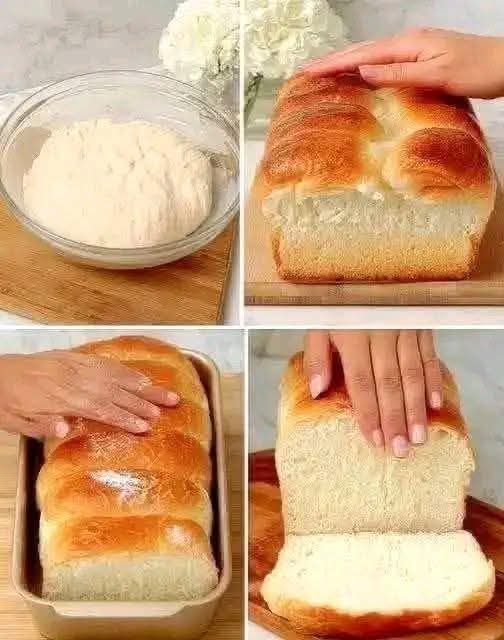
There is nothing quite like the comforting aroma of freshly baked bread filling your home, and this classic Amish white bread is the ultimate crowd-pleaser. Known for its incredibly soft crumb, lightly sweetened flavor, and golden crust, this traditional loaf relies on simple pantry staples. Whether you are slicing it for morning toast, making a hearty sandwich, or enjoying it warm with a generous smear of butter, this recipe brings bakery-quality results straight to your kitchen.
Ingredients
- Warm Water: 1 ½ cups (at 105°F to 110°F to activate the yeast)
- Active Dry Yeast: 1 tablespoon (or 1 packet)
- Granulated Sugar: ⅓ cup (divided: a pinch for the yeast, the rest for the dough)
- Milk: 1 ½ cups, warmed
- Salt: 2 teaspoons
- Vegetable Oil: ⅓ cup (or melted unsalted butter)
- All-Purpose Flour: 6 to 7 cups (bread flour can also be used for a slightly chewier texture)
Instructions (Step by Step)
- Activate the Yeast: In a large mixing bowl or the bowl of a stand mixer, combine the warm water, active dry yeast, and a pinch of the granulated sugar. Let it sit for 5 to 10 minutes until the mixture becomes frothy and bubbly.
- Mix the Liquid Base: Stir in the remaining sugar, warmed milk, salt, and vegetable oil (or melted butter) into the active yeast mixture. Whisk until well combined.
- Add the Flour: Gradually add 6 cups of all-purpose flour, one cup at a time, mixing well after each addition until a sticky dough forms.
- Knead the Dough: Turn the dough out onto a lightly floured surface or use a stand mixer fitted with the dough hook attachment. Knead for 6 to 8 minutes until the dough becomes smooth and elastic, adding a little extra flour if it remains too sticky.
- First Rise: Shape the dough into a ball and place it in a large, greased bowl, turning it once to grease the top. Cover the bowl with a clean kitchen towel or plastic wrap and let it rise in a warm, draft-free place for 1 to 1.5 hours, or until doubled in size.
- Punch and Shape: Gently punch down the risen dough and turn it out onto a lightly floured surface. Divide the dough evenly into two equal portions. Shape each portion into a smooth loaf and place them into two greased 8.5×4.5-inch loaf pans.
- Second Rise: Cover the loaves loosely with a towel and let them rise a second time for 45 to 60 minutes, or until the dough crowns nicely over the edges of the pans.
- Bake: Preheat your oven to 350°F (175°C). Bake the loaves for 30 to 35 minutes, or until the crust is a deep golden brown and the bottom of the loaves sounds hollow when tapped.
- Cool: Remove the pans from the oven and immediately turn the hot loaves out onto wire racks to cool completely before slicing.
Service Suggestions
- The Classic Spread: Serve thick, warm slices slathered with salted butter and a drizzle of honey or your favorite fruit jam.
- Sandwich Base: Use it for classic comfort-food sandwiches like grilled cheese, BLTs, or turkey clubs, as the soft texture holds up wonderfully without squishing.
- French Toast: Cut thick slices and use them to make a rich, decadent batch of weekend French toast.
Storage Tips
- Room Temperature: Store completely cooled loaves in an airtight container, bread box, or zip-top bag at room temperature for up to 3 to 4 days.
- Refrigeration: Avoid storing bread in the refrigerator, as the cool environment accelerates staling and dries out the crumb.
- Freezing: To freeze, wrap individual loaves or sliced portions tightly in plastic wrap, followed by a layer of aluminum foil. Freeze for up to 3 months. Thaw at room temperature before serving.
FAQs
Can I use instant yeast instead of active dry yeast? Yes, you can substitute instant yeast directly into the flour without proofing it in water first. However, dissolving active dry yeast in warm water ensures it is alive and active before you commit your flour.
Why is my bread dense and heavy? Dense bread usually happens for one of two reasons: adding too much flour during the kneading stage, or not allowing the dough to rise fully during the first or second proofs. Make sure your environment is warm and give the dough enough time to double in volume.
Can I make this recipe by hand without a stand mixer? Absolutely! While a stand mixer makes kneading effortless, this traditional recipe is easily mixed and kneaded by hand on a clean countertop.
Freshly baked Amish white bread offers a rewarding baking experience that fills the kitchen with incredible warmth and yields a loaf far superior to anything store-bought. With its pillowy soft interior and rich flavor, it is bound to become a permanent fixture in your weekly baking rotation.
Conclusion
Freshly baked Amish white bread offers a deeply rewarding baking experience that fills your kitchen with incredible warmth and yields a loaf far superior to anything store-bought. With its pillowy soft interior and rich flavor, it is bound to become a permanent fixture in your weekly baking rotation.